Contributing Markdown
In this tutorial, we will:
- Launch the GitHub.dev browser-based editor
- Create a branch
- Edit file(s)
- Make commit(s)
- Open a Pull Request (PR)
All without leaving the browser. This includes a rich editing experience with real-time Markdown previews!
Where are the Markdown files?
Markdown exists in two places for this app:
- In the documentation: This documentation is separate from the Benefit Tool application, mainly for use by developers and project managers.
- Lives in the
doc/directory. - Rendered by Quarto, so supports some additional features on top of Markdown.
- Deployed by ReadTheDocs, which includes Pull Request previews! This is the most user-friendly experience.
- Lives in the
- Built in to the app: This application is for use by the Benefit Tool’s end-users (respondents and analysts) to aid them in using the app.
- Lives in the Jinja templates directory (
usaon_benefit_tool/templates/). - Rendered by Python Markdown library. Follows the standard Markdown syntax.
- Must be released with a new version of the Benefit Tool and deployed by NSIDC dev/ops.
- Lives in the Jinja templates directory (
Markdown in both locations can be edited in the same manner.
GitHub.dev
This seems like the simplest approach from a quick look. We should try it and see if we like it, otherwise keep looking for more straightforward workflow.
1. Start GitHub.dev
First, visit our repository on GitHub. Next, press the . key (or > to open in a new tab, but your browser may block this “pop-up”), and you should see an editor start to load.
In the GitHub.dev editor, there are 3 important elements for this tutorial:
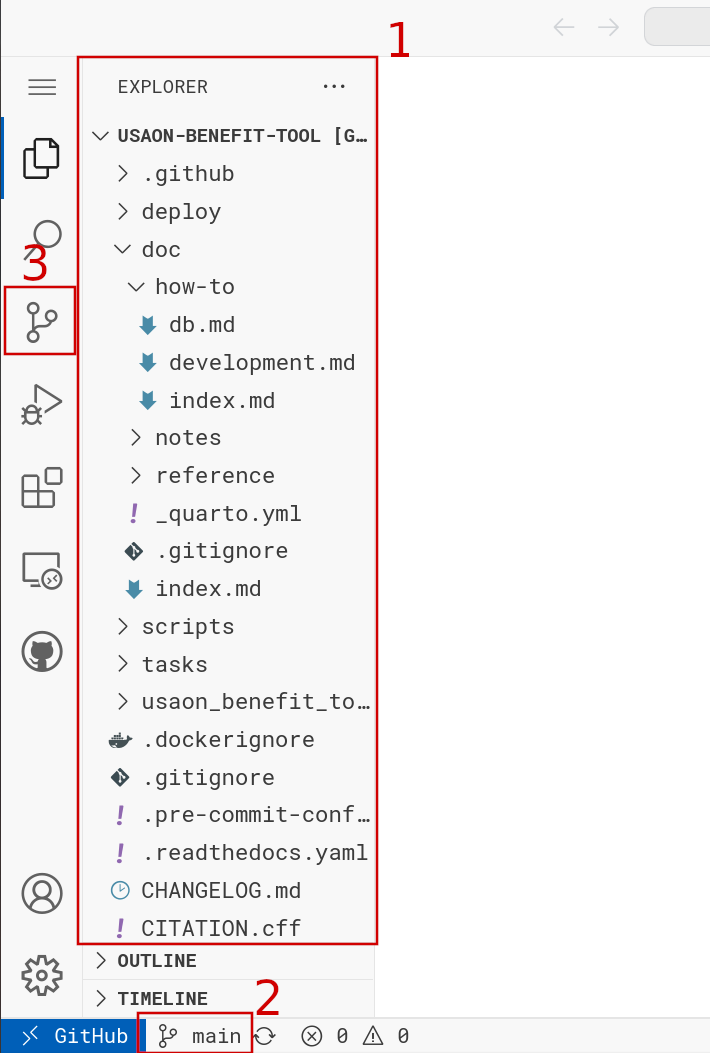
- The File Explorer
- The Branch Selector
- The Source Control Menu
2. Create a branch
Click the Branch Selector and then select “+ Create new branch…”.
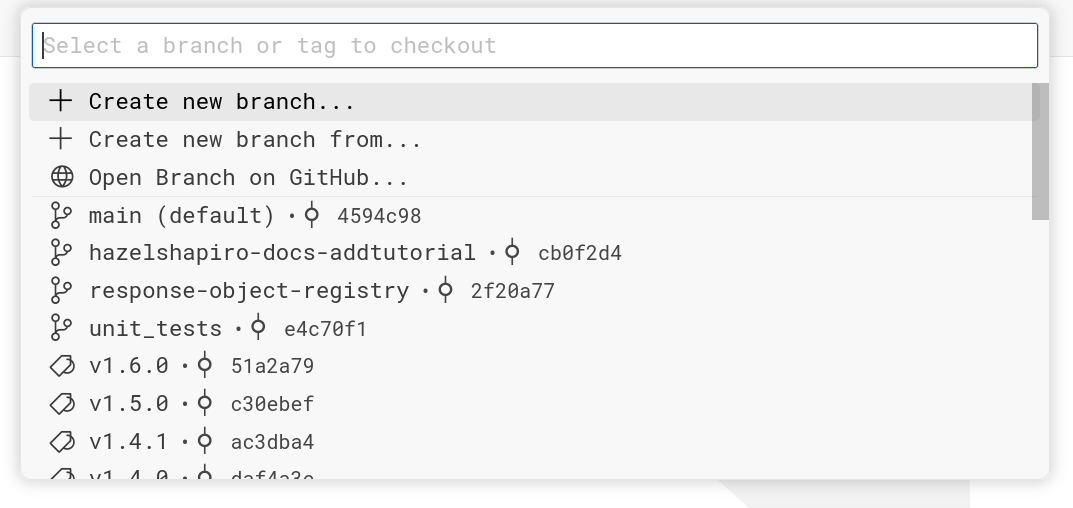
“Create new branch from…” can be useful if you’d like to start working from a branch other than the main branch.
Give your branch a meaningful name, for example docs-tutorial.
Your branch should focus on a small change, like adding one tutorial, or adding a set of related glossary entries.
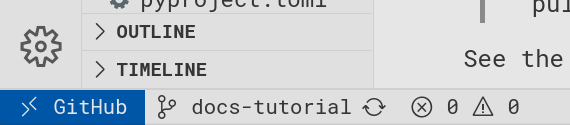
Check the Branch Selector to verify your branch is created and checked out:
3. Edit files
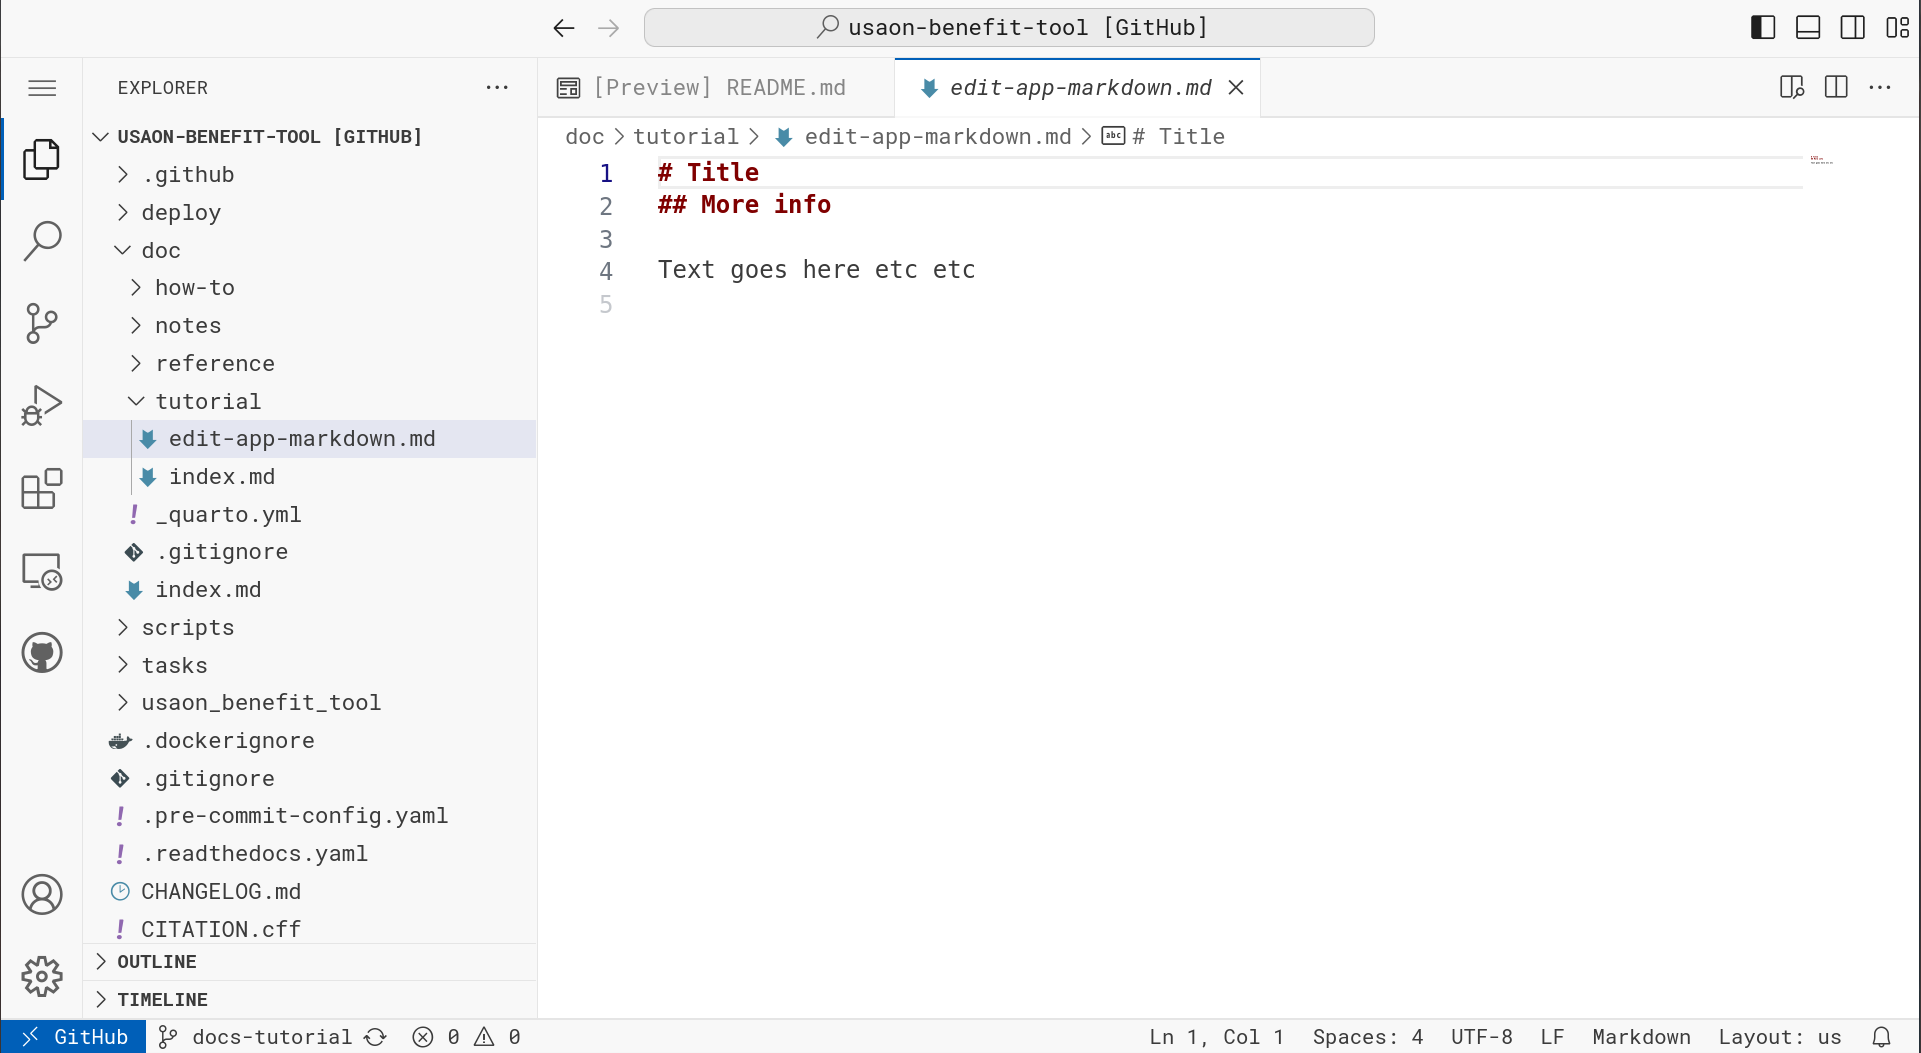
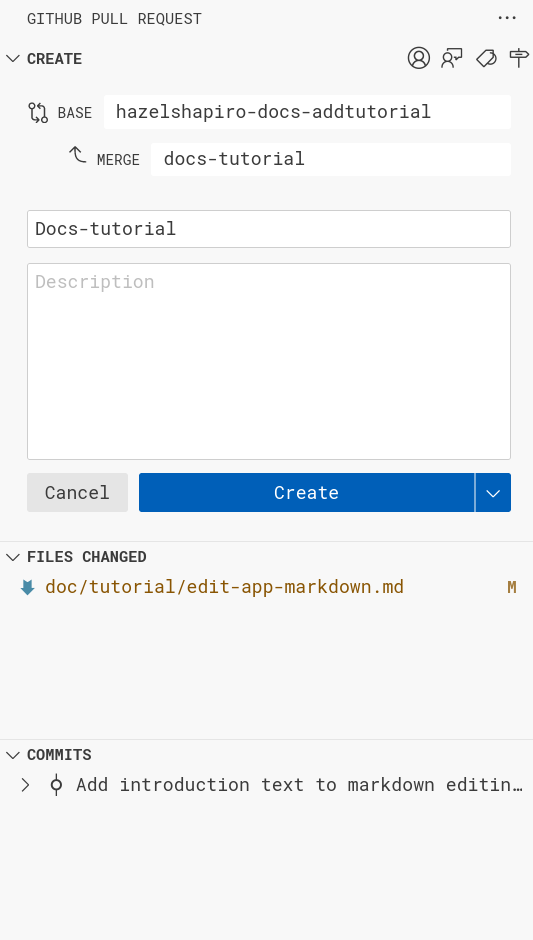
Using the File Explorer, click on the file you’d like to edit. It will open in the editor.
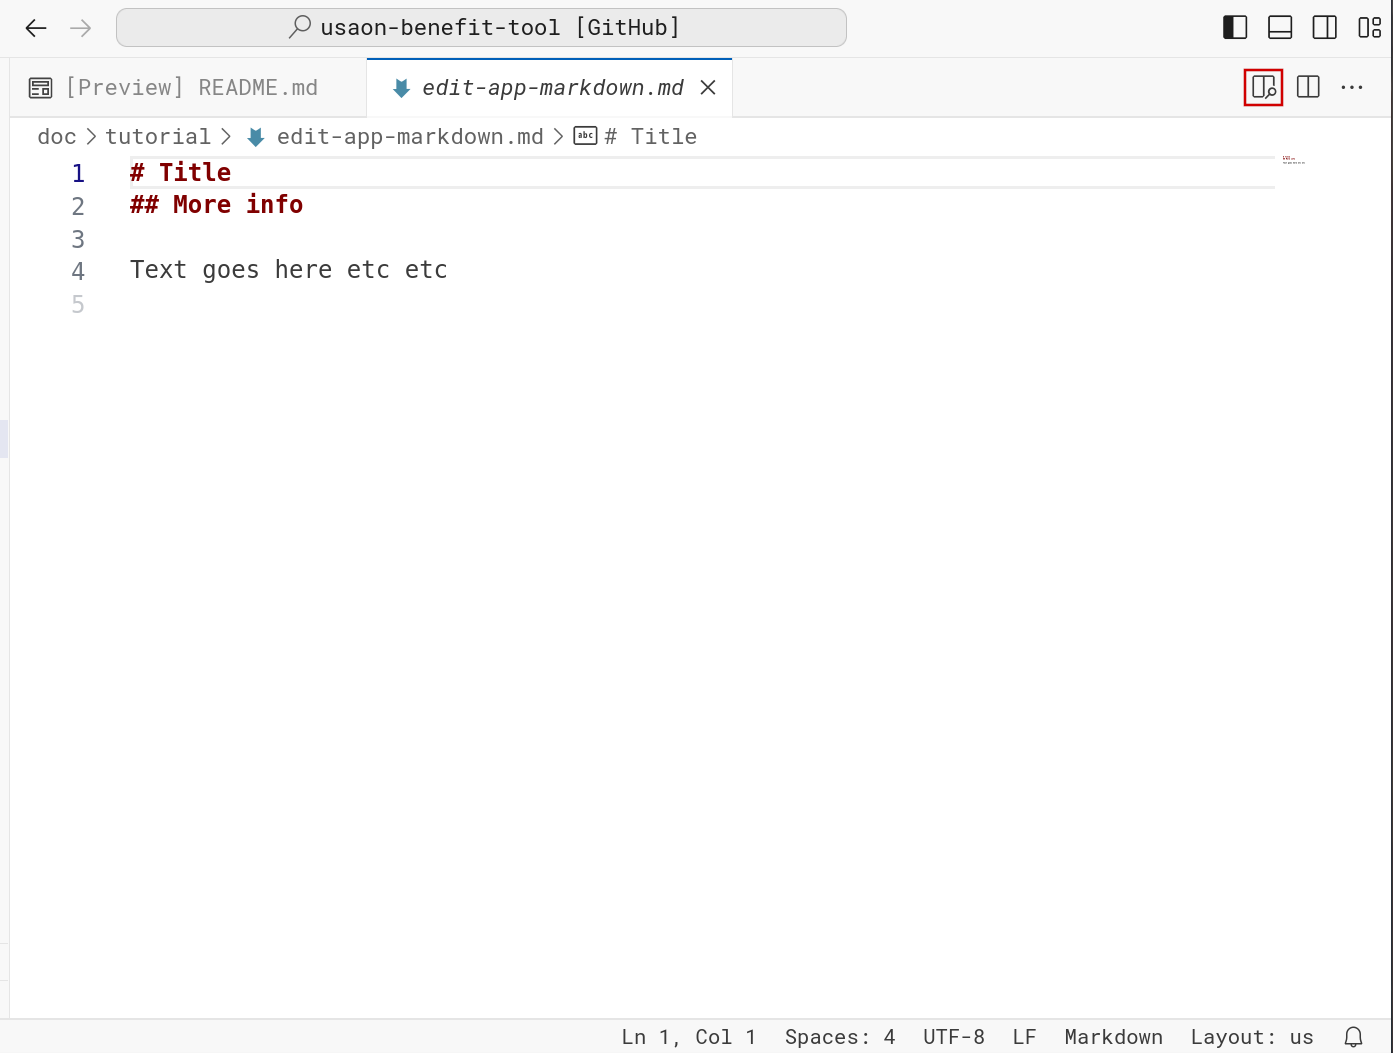
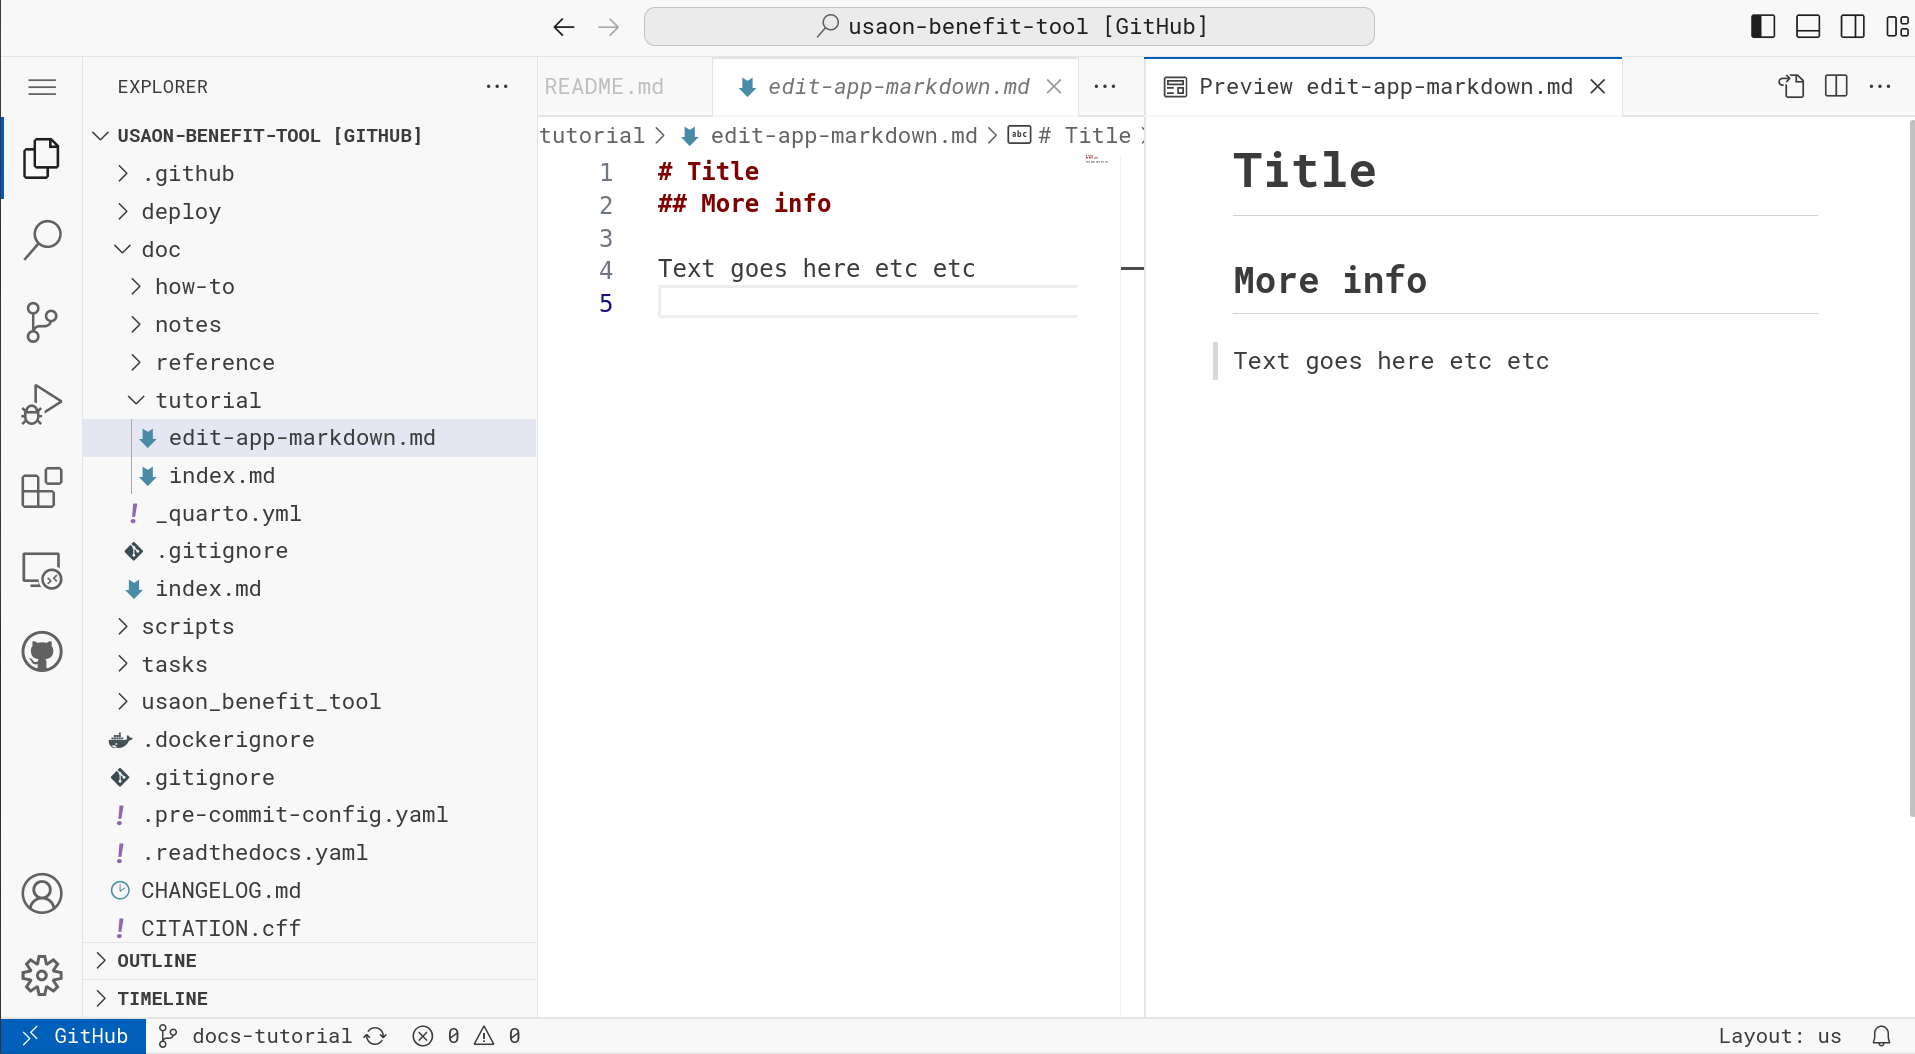
Click the Preview Toggle (highlighted in next figure) to enable like Markdown previewing.
Apply your edits. Once you’ve done this, you’ll notice 3 important things:
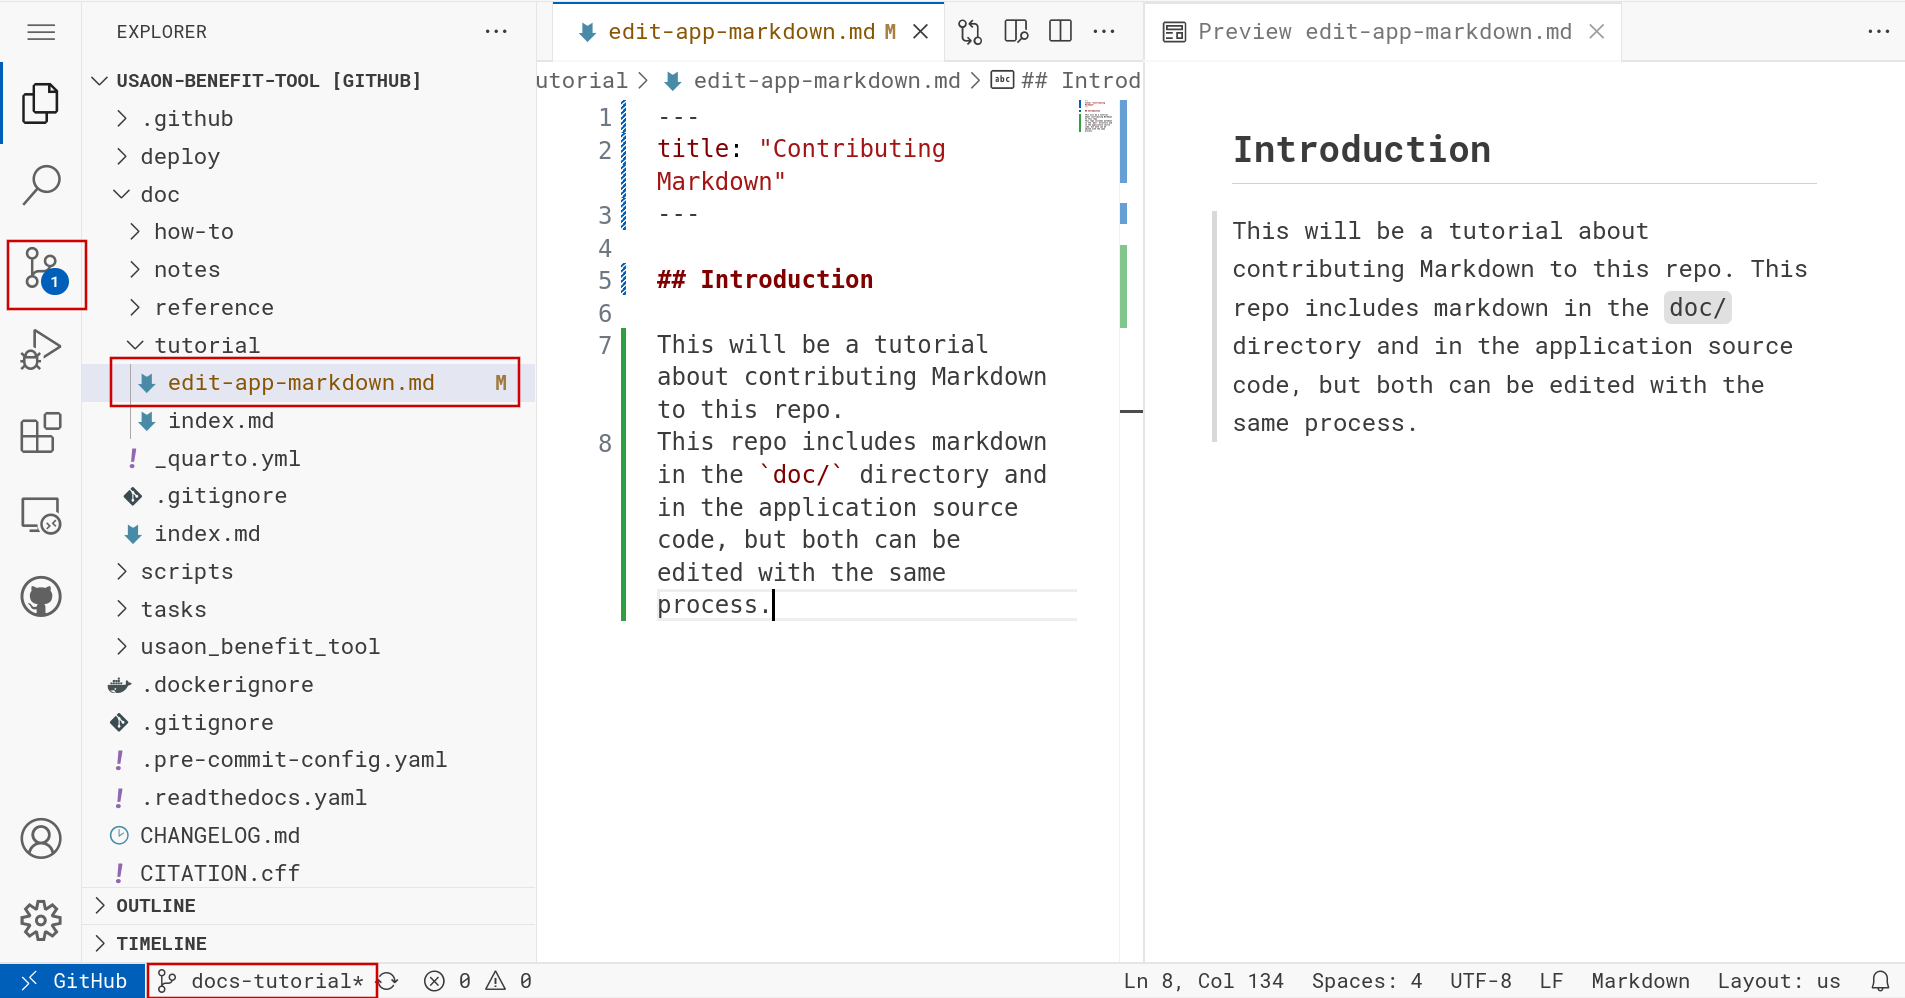
- The File Explorer indicates modified files with an
M. Verify only the intended files are modified. - The Branch Selector indicates modification with an
*. Verify that you are on the intended branch and not themainbranch. - The Source Control Menu indicates
1file has changed.
You can continue to edit more files, but please keep in mind, your changes are not saved yet. Save early, and save often by committing (next step).
4. Commit changes
Click the Source Control Menu. The blue badge on this button indicates how many files have changed, and after you click you will see a complete listing of changed files.
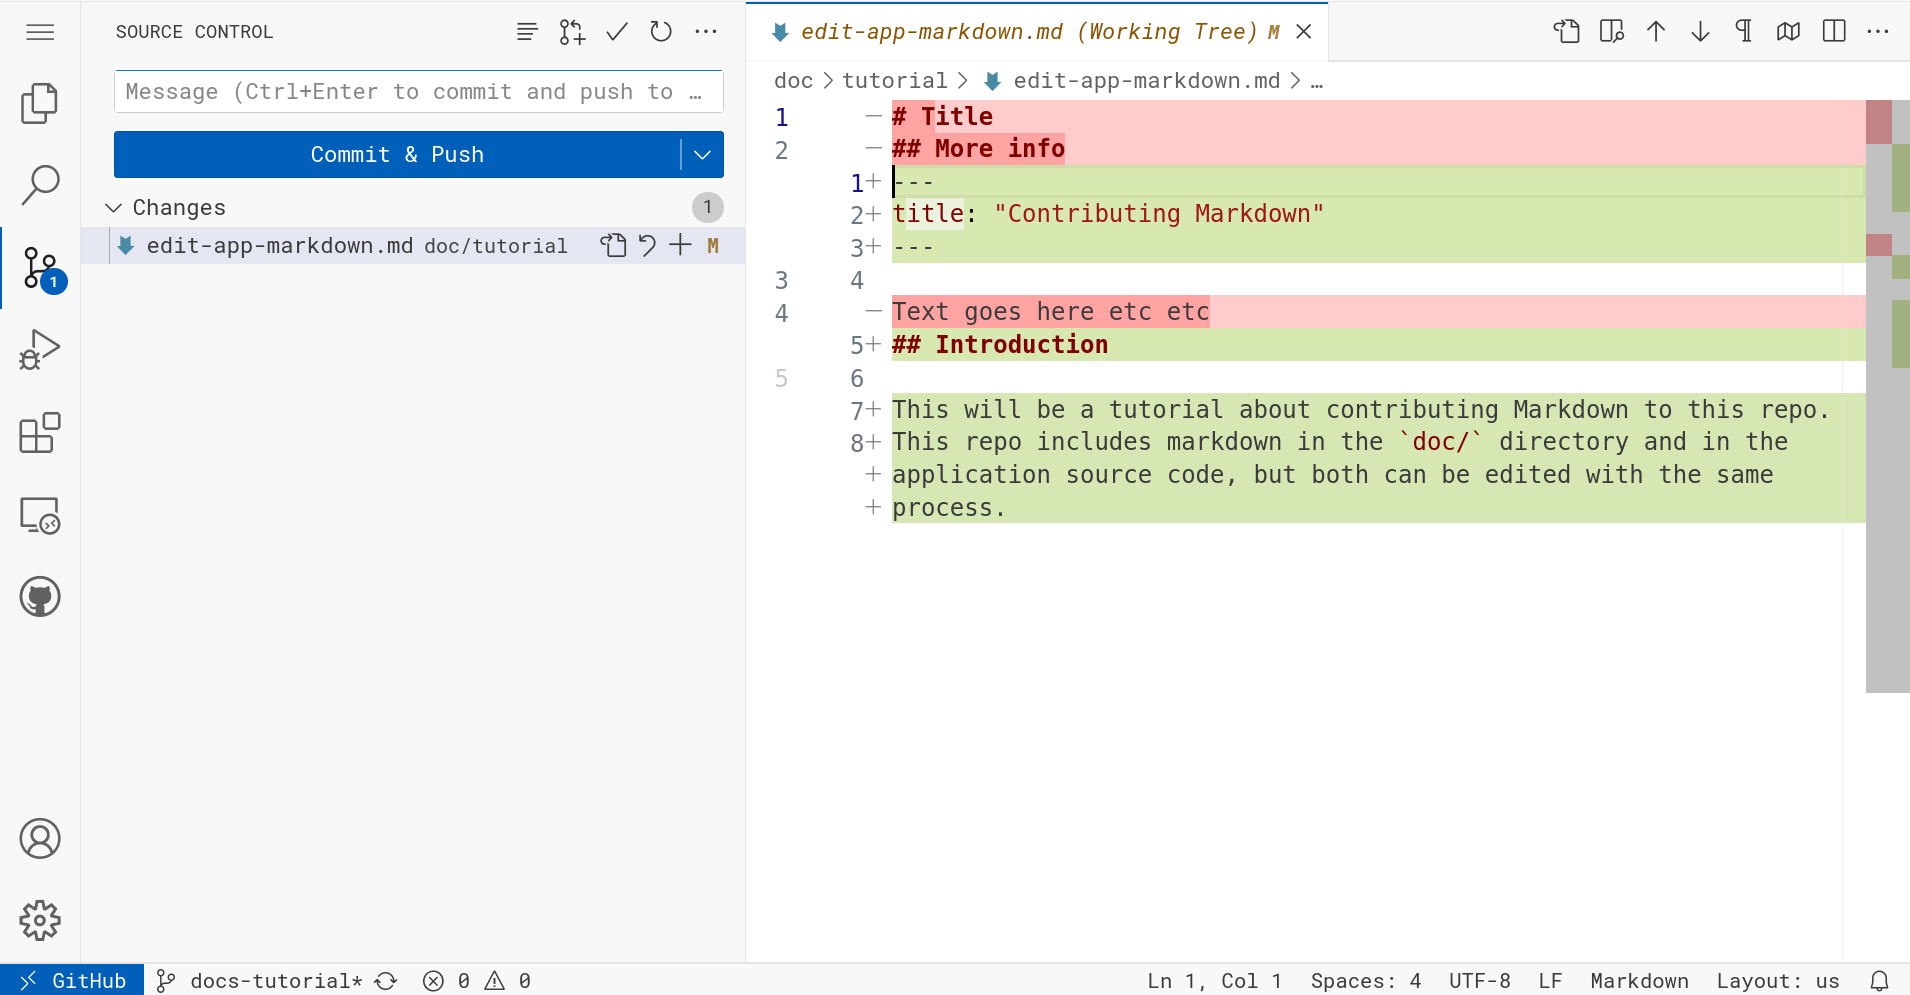
Where the File Explorer was, there is now a listing of changed files. In this example, I’ve only changed one file, but I encourage you to repeat the editing process in this tutorial to change multiple files and combine related changes into small atomic commits.
If you click on a file, it will show what’s called a “diff”. The red-highlighted content is removed content, and the green-highlighted content is added content.
Verify your changes look as you intended!
Click “Commit & Push”
A pop-up will warn you that you must specify a commit message to proceed. Writing good commit messages is important, because they help future us understand what present us was doing, and more importantly, why.
A good rule of thumb is to write a commit message by filling in the blank: “When applied, this change will blank.” For example, the commit message I will use for adding the tutorial you are reading will be: Add a tutorial about contributing docs with github.dev.
As soon as you click “Commit & Push”, your change will be saved to GitHub.
You may repeat the edit and commit cycle to create as many commits as you like before moving on to the next step, but please try to keep the pull request easy to review by only including related changes.
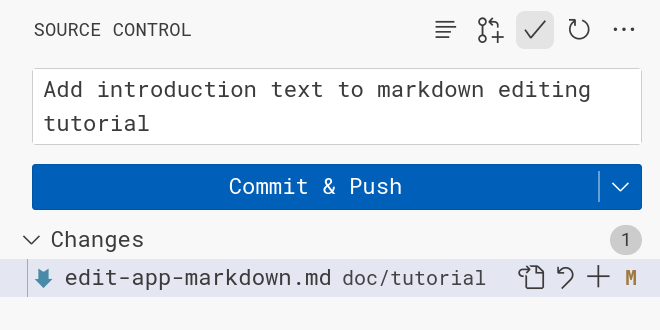
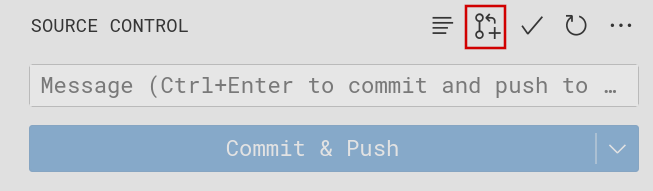
5. Open a Pull Request (PR)
Click the “New Pull Request” button, highlighted in the figure above.
This will open a strange pull request menu within GitHub.dev. I think that’s probably fine, but it’s also an option to open the pull request within GitHub.com’s New Pull Request interface.
Double-check the “base” branch is set correctly. Usually, you want it to be main, but in my case I created my branch from another branch called hazelshapiro-docs-addtutorial.
Enter a meaningful Pull Request title, for example “Add new tutorial about contributing documentation with GitHub.dev”.
Enter a useful description, for example discussing why you made the decisions you made in this change.
Verify “Files changed” and “commits” include the intended contents.
You can now click “Create” and your pull request will be opened! 🎉